CNC finally running

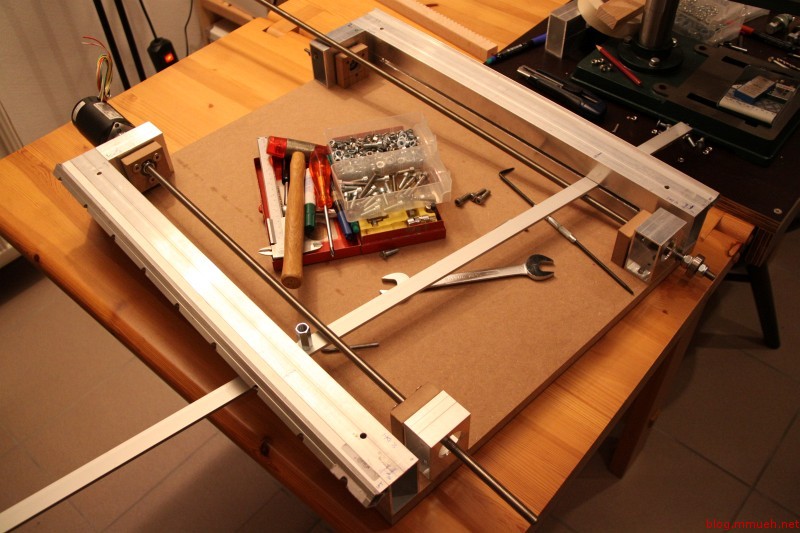
The CNC mill got into a working state right before christmas eve. I know it’s not a present in that sense, but still! :3

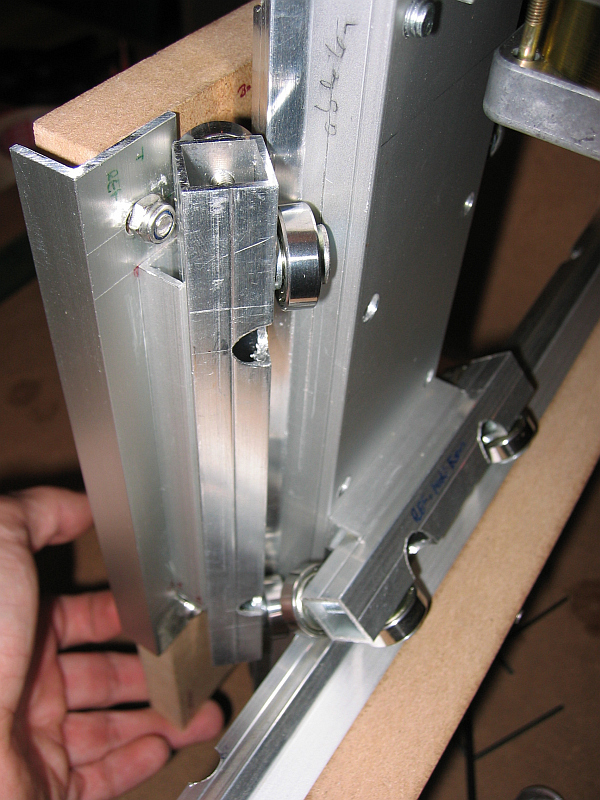
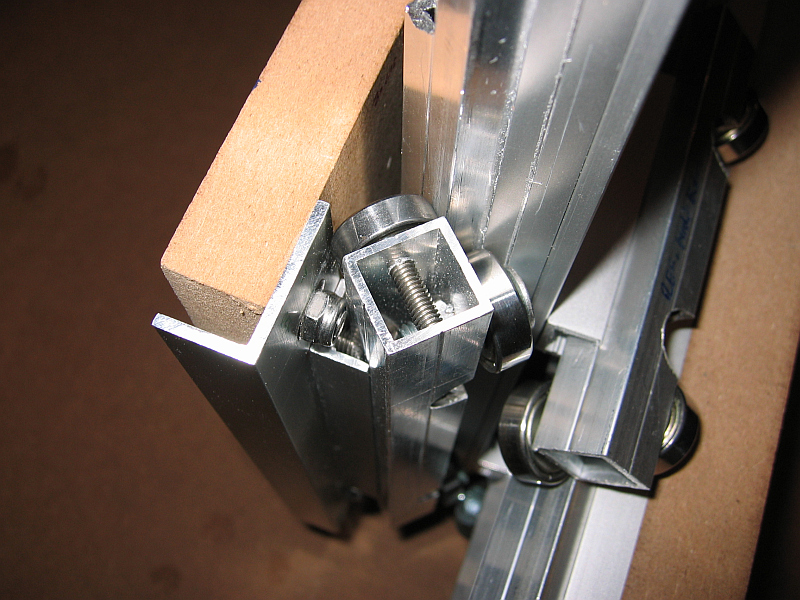
Some parts of it are still fixed with a lot of glue and tape (or zip-ties ^^), but for now that’s perfectly sufficient. Right now. it can already mill hard wood and MDF, so I will be redoing some critical parts that lack in precision and/or quality before I write up the whole project as one. Unfortunately, I fear that the original plan about using an (older) EPIA 800 board as a controller can not be followed, EMC2 just refuses to start on that thing. Grrrr…

More pictures and text will follow in a few day’s time. Until then, enjoy the holidays and have a nice and safe start into the new year!

Oh, right, and two Stellaris Launchpad eval-kits from TI that I ordered back in September arrived JUST ON the 24th. How great of a timing is that? I don’t care about the wait, it was well worth it and I knew up front – but thanks again to the girls and guys of the TI support, for solving all the technical difficulties along the way :-)

Workbench #3

Work on the CNC continues…the end draws nearer. I am currently disassembling the whole thing as far as necessary to clean up all the edges and burrs and fix the positions of the parts relative to each other using hammered-in stainless steel pins. After that, it is just coupling the threaded rods to the moving parts and bring the stepper drivers alive.

Workbench #2

So much for the current status of the CNC milling machine. I have made some first experiments with L297/298 motor drivers and found out the hard way that these are quite overloaded with such strong motors. Burnt out in a matter of seconds. But, as BJT driver bridges are not state of the art anyways, and I want to take a lesson from this project, I decided to finally get myself some of those specialized ATMEL controllers (AT90PWM1) and try to design my own FET bridge driver.

I even have one in spare that I can use for experiments with a self-designed high intensity discharge lamp driver – I have attached an image of an early prototype to the gallery for your entertainment. Worked quite well for some time, but the driving was very crude – there are some logic gates on the bottom of that small pcb that generate half-bridge signals for the two FETs, but no care taken about anti-shoot-through and so on. VERY crude. I will report how well the new controllers work out, seeing that very few experiences are found :-)

As for the CNC, I am quite confident that I will finish the mechanics part within the next holidays (around easter). Then, all that remains is the ‘intelligent’ part.

Last but not least, I notice that I still do not manage to describe my projects in my self-desired level of detail. Thus I will focus more on taking pictures during the process and explaining from now on.

Slow progress

Just a little heads-up for the time being: This is one of the things I am currently working on. I have some things with DFN-packaged parts in the making, this also belongs in that category. The IC is a Texas TLC5941 16-channel programmable LED pwm controller, and the whole thing will be an ambilight system that can be easily scaled by adding more of these stripes. Each stripe will contain 5 individually adressable RGB-LEDs, equal to 5 individual zones. The master signal will be delivered by the pc (no, unfortunately I have no plans in stock to decode VGA or DVI so far, as this system is inteded purely for pc-aided use) via serial comm and formatted by an Atmel ATMEGA to fit the daisy-chaining protocol of the TLC chips. This also means that additional boards can be connected without much hassle.

Ambilight preliminary pcb

Hopefully, I can produce the first PCBs myself. The biggest problem are the through-hole contacts, but I guess this can be done using 0,6mm contact rivets. Of course, I am in no mood to do this for all the 50-some boards that will be needed – I am not the only person interested. The angled pinhead connectors at both ends will be replaced by rows of soldering pads so that two pcbs can be soldered together without a gap. Alternatively, they can be connected by soldering flat cable or even single wires in between.

I already have all the necessary chips and a whole lot of LEDs for some prototype boards, but I need the reflow oven to work properly for this – the chips are DFN, as mentioned. I soldered one of them bottom up to some pinheaders using thin enameled wires: Avoid if you can, it’s NO fun at all! The chip survived the torture, surprisingly.

Hopefully I can make some progress on the oven tonight. I already equipped one of these things with a diy controller before for a friend, so the software is kind of done.