Now that a communication with the STM32 has been established, it’s time to start checking out the data exchange a bit more. From Jaro’s notes (see references in part 1), many of the most important IDs are known already. However, I suspect that there’s more to that. For example, it appears that the app can display the filtered air volume rate, which means that either the value itself or some kind of motor power or RPM value should be available. Looking at the ID scheme also brings to mind that there are a lot of spaces that can be filled between the known commands.
Continue readingReverse engineering
Improving a Xiaomi Air Purifier 3H (1)
I bought this used broken unit after covid, not really to solve any air problems but because I found the integrated sensors pretty interesting for the price. The Xiaomi air purifiers operate on a laser particle sensor to measure air quality, combined with a Sensirion SHT temperature/humidity sensor. The data are available over wifi via the smartphone app, which is rather not to my liking – especially hooking up such a reportedly unsafe ([4]) device to my network. That is something I wanted to change, along with fixing the motor. Well, a lot of time has passed, but now it’s actually happening.
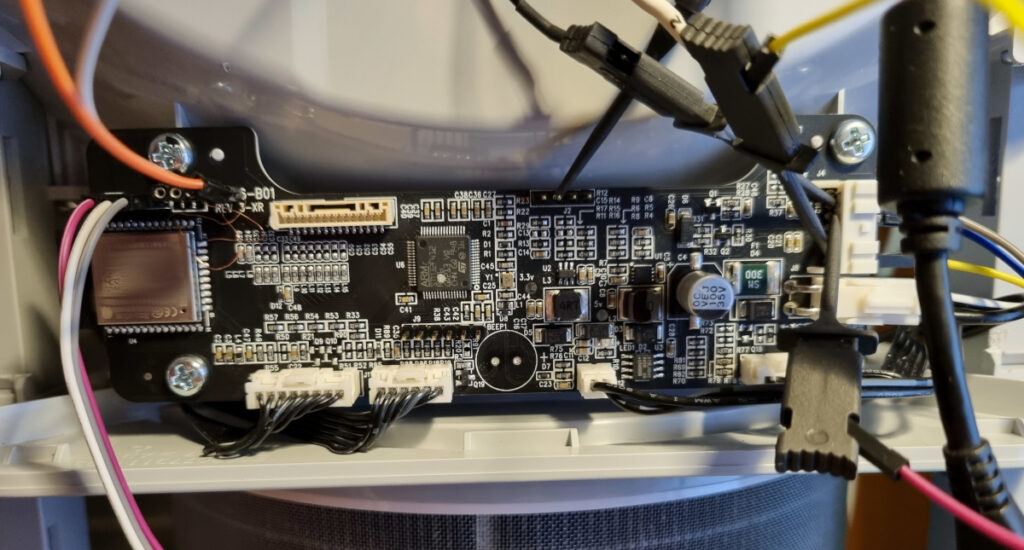
I’ll try to add to the others’ knowledge wherever I can. I am currently writing my own custom software for the ESP32 with the aim of integrating the 3H into an MQTT ecosystem, but keeping out overhead like ESPHome or Home Assistant. I’ll push that to Github in the next few days when it’s finished – more to follow here. The code is written for the Espressif IDF toolchain, to be compiled in the Eclipse IDE. It uses standard libraries or openly available ones wherever possible, but also builds on Jaro’s code for the communications part. At a later point I also want to dabble at replacing the STM32 code. I should mention that this post series is not about dumping or modifying any original code or data, or about anything related to the cloud link, since all of that is most likely a waste of time. I’m not going to keep any linkage to the original cloud/app, but for the time being successively replace parts of the functionality – which requires me to figure out how things talk to each other.
Continue readingReusing a Jura LED dot-matrix display
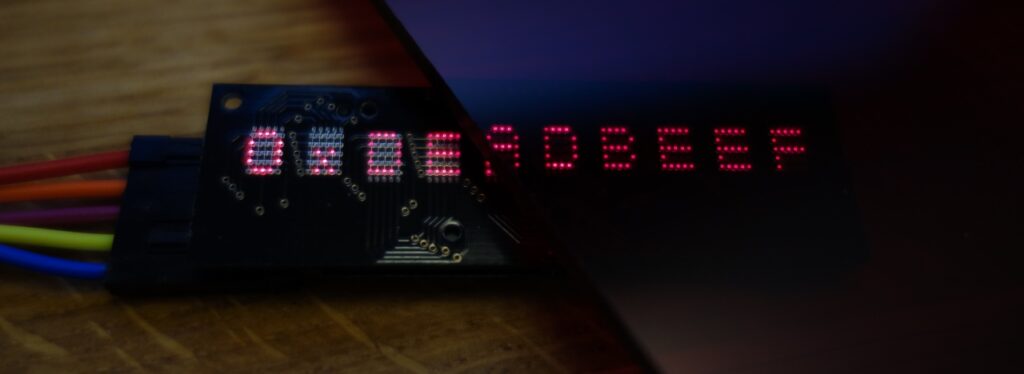
Yes, this is about fancy displays – again. I have been wondering for a while whether it could be simple to repurpose the LED matrix displays often found in Jura coffee machines. Mounted behind tinted plastic they give the front panel a distinctly premium look. Coincidentally, they look highly similar to the Osram- and Avago-made PDSP/HDSP intelligent dot-matrix module series, which is what I was initially expecting to find when pulling apart the control panel of a scrapped Jura Impressa C9. Let’s just say the expectation was pretty far from the mark.
Monitoring and controlling a JUDO i-Soft plus via LAN
Some time ago, a water softening device was installed in my home main water supply line. Such a device contains one or multiple gel capsules that act as ion exchangers, replacing calcium and magnesium in the fresh water supply with sodium. In regions with a rather hard water, this can save you a lot of trouble with maintenance of valves and the lifetime of water-consuming devices like washing machines and dishwashers.

For regulation, a conductivity sensor determines the hardness of the incoming water. After running through the gel exchanger, the residual hardness is assumed to be around 0.5 °dH which allows the mixing ratio of raw and processed water to be calculated. I won’t go further into details here, the bottom line is: It works like a charm, water is as soft as it needs to be. The device at hand is built by JUDO and is available in several configurations. Basic models contain a two-capsule exchanger for seamless switchover/regeneration cycles and an integrated electronic control unit for automatic regeneration of the gel. A more advanced “i-Soft plus” model is extended by a touchscreen user interface complete with LAN/WLAN network access. This enables monitoring through a specialized iPad application where the interested user can view total water consumption per day, week, month or year as well as change different system parameters. As a nice bonus, the plus unit has an integrated main line valve which is closed automatically whenever user-set time, volume or flow rate limits are exceeded. This already saved my ass once when a pipe became leaky inside a wall. Unfortunately, the exact protocol for communication with the device is not disclosed, which is where this story begins. Continue reading
Schlumberger 4002 signal generator
While working up some extra circuits for the spectrum analyzer, I managed to pick up an old signal generator from eBay.
I heard a lot of positive things about the German (actually French origin, please look at comments below. Thanks to Rohit for pointing this out!) brand “Schlumberger” before, even though there is no relation to any personal experiences with their equipment. Seems like they also ran some kind of subcompany outfit called “Solartron” or “Enertec” which would today sound more than fishy, what with all those copycat-brands out there. But when an auction came up for a reasonable price I decided to go for it after some short research on the net.
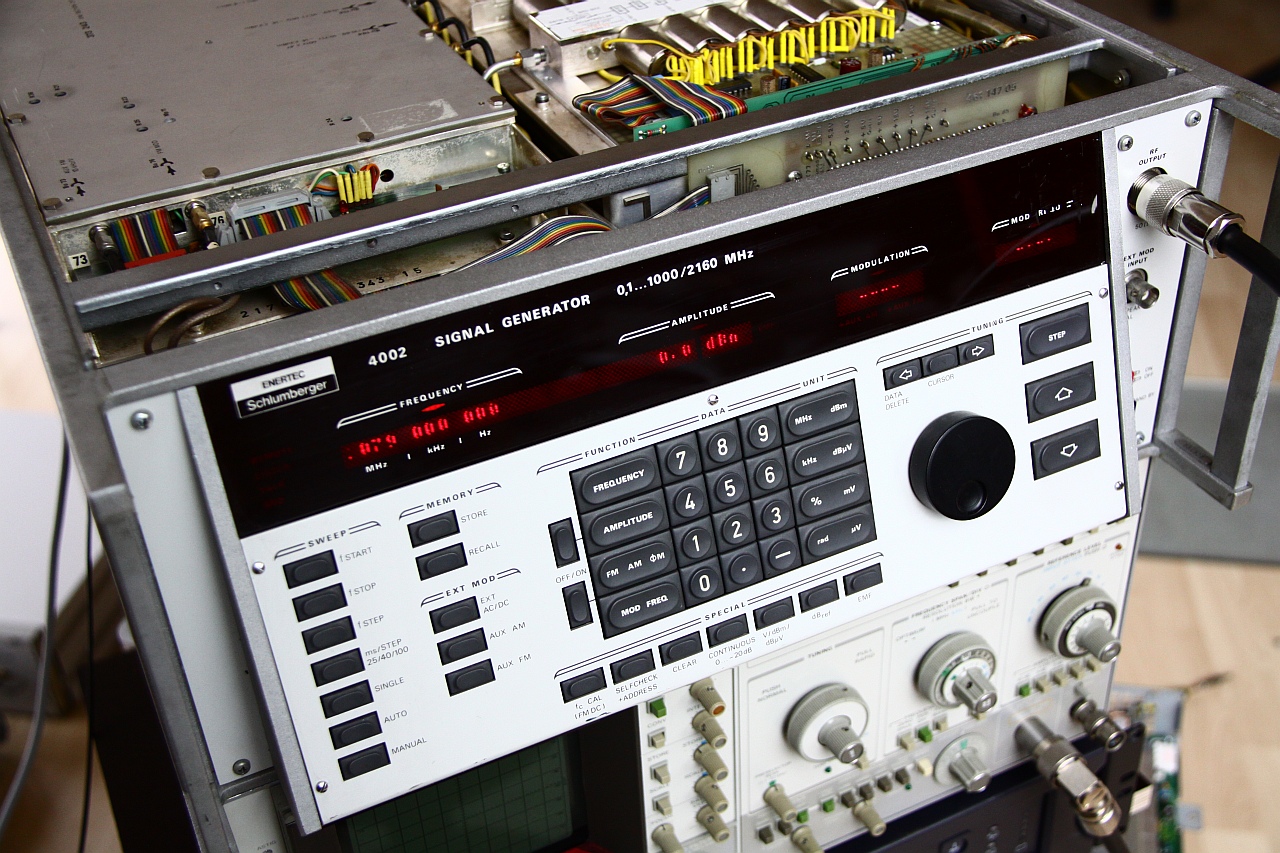
Don’t mind the tearing effect on the LED displays, not visible to the naked eye. I already pulled all the side panels.
What I got was a Schlumberger 4002 signal generator. It ranges from 0.1 to 2160 MHz with 10-20 Hz tuning accuracy, selectable output amplitude from -138.9 dBm up to +13 dBm in 0.1 dB steps, auto-sweeping and several extras like an OCXO for stability, 20 dB of linear attenuation range without using the step attenuator, an internal modulator and IEC bus remote control. If you looked at the photo closely, you will have noticed that the frequency range is written as “0.1…1000/2160 MHz” on the front panel. The reason for this is the optional doubler module included in this instrument. If the module is installed and detected, the software switches over to extended range without any further changes. Else, 1000 MHz is as far as it goes. More detailed specs will follow as soon as I can decypher the bad scan of a manual page that cropped up on Google. Judging from the inventory labels on the backside, the device must have been used in the manufacturer’s own lab. Unfortunately I have not yet managed to find any service info even though the manuals seem to be sold sometimes, for rather terrible prices. Continue reading
Wacom digitizer screen
Anyone who has already tried to use some kind of tablet device for writing should know that there are fundamental differences between screen types.
The most common is the capacitive type, where you use a finger or some kind of conductive pen to write on a glass surface, while the touchscreen device captures movement of the capacitance change through a grid of transparent electrodes on the backside of the glass. This works, but it sucks for writing precise text or drawing sketches. You can find these screens in almost every modern smart phone, tablet PC or kitchen appliance. They are cheap!
Next is the resistive touchscreen, where a small, hard point presses down on a plastic surface. The touch element is composed of two pieces of clear foil, coated with a conductive material. While the two layers stay isolated when there is no pressure applied, the pen forces them together in a certain point, forming a conductive path. By knowing the specific resistance of the surface coating, the circuit can determine the position of the pen tip by measuring path resistance from different edges of the screen. This type was pretty popular in PDAs (which have by now been fully replaced by smart phones, what a shame ;-) ) as well as the almost equivalent navigation assistants – and is not that common anymore. Writing performance is fair but not exceptional, though.
The third kind is the most interesting one. Real tablet PCs (the ones with the flip-over display) have this normal-looking pen with the nylon tip, which you can use to accurately write on the glass/plastic display surface. Many even feature some buttons on the pen, some kind of eraser on the backside – and they are damned accurate! They have another thing in common: Most of them use technology by a company called Wacom, also producer of digital writing and drawing pads for artists.
This type is called a “digitizer screen”, and it uses a sensing panel *behind* the actual display to recognize and track the pen. The digitizer panel contains an amazing set of surface coils to provide an alternating magnetic field through the screen. Inside the pen, there is a resonant circuit which uses the field energy to transmit the button states and even pressure on the pen tip back to the coil. By monitoring the strength of the resonance through different surface coils, the digitizer then calculates the position of the pen above the surface. In other words, you get a high-res info about the pen position (easily above 25.000 points resolution along the surface edge, depending on the digitizer type!), you know the pressure applied, button presses on the pen and even where the pen is when it is not yet touching the surface.
I recently disassembled a trashed tablet PC (Toshiba Portege) with a broken motherboard for interesting parts, and came across this:

The LCD panel is a LTM12C328T type. Attached to the backside is a SU-010-X01 tablet pen digitizer, and the marking on the ICs clearly suggests that it is made by Wacom. This would make a fine graphics tablet – but how to attach it to any other PC? Continue reading